21.
Ok, so I made the first batch of bread yesterday, and learned a lot.
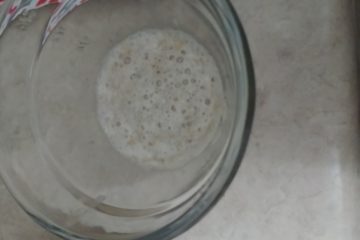
In kneeding it was definatly “as hard as ye can handle it”, as I had to wet my hands twice while working it for it to kneed properly. The sponge was a bit disapointing. The yeast culture seemed to separate from the water and slow down. This must be why people recomend that you stir the yeast every few hours when doing a low yeast content sponge. Also, I’ve read that if you let the yeast sit in water too long that it exhausts the yeast, but I suspect that’s if you’re not adding the flour for the yeast to eat. I think I’m going to bump the amount of yeast back up to where I had it before. I’m also going to decrease the length of time I let the sponge sit, as with a full ammount of yeast I just have to wake it up, rather than trying to breed it.
 The bread did not rise much. Just barely getting to double after 12 hours. This is probably because the yeast didn’t grow nicely in the sponge. I didn’t punch it down, as I felt that the rising had basicaly ended. Instead I just devided it and let it rest a little.
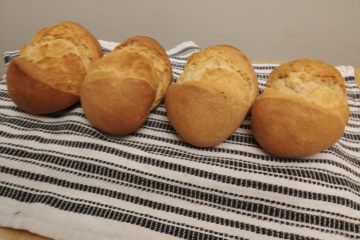
I formed two small rounds of bread, as I wanted to eat one and save the other. I decided to play with the bread, trying to make crowns on top by slashing deeply. It worked well. I may try that again in the future. The bread baked well and got a nice crust on it. It smelled heavenly.
And then for the biggest test. I cut two slices off one and put a bit of butter on it.
- Shape: It rose in the oven, for which I am highly thankful, and made what would be a perfect bread bowl if that’s what I was using them for. But the important thing is that they take shaping well. So I’ll probably be able to play with this.
- Crust: Nice and thick, a little chewy and nutty. I am very pleased with the crust.
- Crumb: Thick and close, what I was expecting from a low hydration bread. I had hoped for a bit more rising action to lighten it up a bit, but I think that’s from the small ammount of yeast.
- Taste: Not enough salt. I don’t know if it’s because the source recipe would have used salt which was ground smaller via a morter. I think I may grind the kosher salt down next time so it spreads more evenly and will have the right ammount. I’ve had success with this method in the past. Other than that it was a nice, if overly heavy bread.
 Conclusion:
I like the bread in concept, but between the lack of rising and the not enough salt this round (pun intended) isn’t right. I will be saving the other loaf, and cutting into it on sunday evening or monday morning to test the staleness. This recipe should go stale in three to four days. I hope that it works out well. I’m a little concerned that with not having enough salt it may attract mold more easily.
The secondary plan for the bread is to see how it would work as a trencher. Which is why I’m quite happy that it’s a dense bread, as I need a dense bread for a good trencher. I need a slightly less dense bread than this turned out though.
The whole wheat to white flour ratio tasted great, but I think it’s too brown to be Manchet. I think that I’ll go back to my previous plan of 1/2 cup whole wheat to 3 1/2 cups white. But when I do this properly I may have to get some stone ground whole wheat and sift it myself to get the white. I want the white to be lacking most of the bran, but to include the germ. That way I wouldn’t have to do any blending at all. Of course that means that I’ll have to learn how they did boulting in the 16th century.
Ok, new recipe time. I’ll have to delay the ale barm test untill Uilliam makes his next batch anyway, so that won’t be a problem.
Yeast Bread
- 4 cups flour (1/2 c ww, 3 1/2 c wh)
- 1 1/4 cups warm water
- 1 tbsp yeast
- 2 tsp salt (if kosher, grind in morter)
- Take 1 1/4 cups warm water and put it in a large bowl, add yeast, and slowly add 1/2 cup whole wheat flour and 3/4 cup white flour, stirring, let rest out covered lightly (linen perhaps) for a few hours
- Once the yeast mixture starts bubbling add 2 tsp salt, stir then add the rest of the flour mix it together
- Kneed 8-10 minutes, you may need to wet your hands once or twice
- Put back in bowl and cover
- Let it rise until doubled may take up to 12 hours
- Punch down, form into loaves, let rest for 20-30 min
- Preheat oven to 450 with baking stone and broiling tray in
- Slide loaves onto baking stone
- Pour 1 cup water into broiling tray
- Bake for 30 min or until crust is browned and firm


1 Comment
A Reassesment of Medieval Bread | Tomas de Courcy · June 30, 2011 at 12:32 pm
[…] you want to take a look at the previous versions check Medieval Style Bread part 1 2 3 4. All of them are more inspired by medieval as they don’t use […]